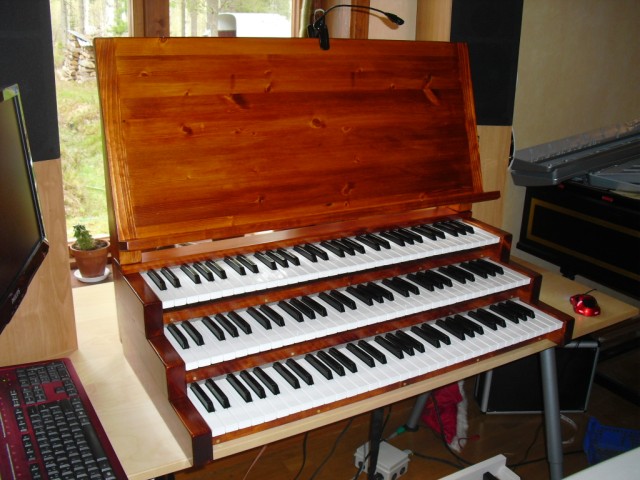
 After having played with my first setup for some time, the desire to create a more "organ like" appearance became stronger and stronger. So, now I'm doing a new manual setup without the keyboard cases! My keyboard stack is heavily inspired by Vidar Fagerjords setup mentioned earlier, but I've added overhanging keys and upper manuals that slope slightly towards the player.
First of all I took one of my M-Audio Keystation 61es apart to have a good look at the inner content. Also I wanted to know the exact dimensions that I should work with. The keys sit on a rigid stand that's screwed to the case bottom, it's connected to the electronic mainboard with one flat cable and one power cable. The volume slider, pitchbend and modulation wheels all sit on their own PCBs and are connected to the mainboard with flat cables.
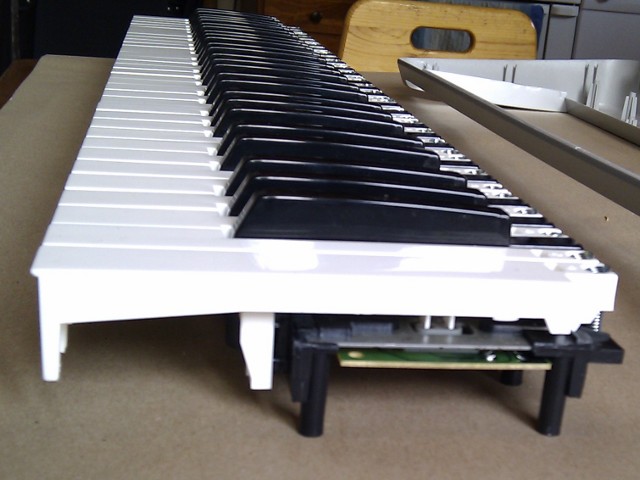
 The natural keys have a rather big plates going down under them. I figured that they could possible be annoying when the keyboards would be stacked more closely together and with overhanging keys so I decided to remove them. I used a small handheld multi-tool with a thin cutting disc to remove them, and
 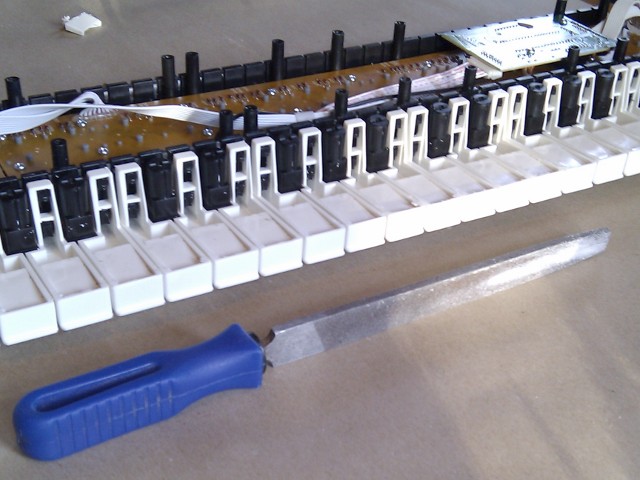 afterwards smothed out all the surfaces with a file. That took some time to accomplish but the end result is nice.
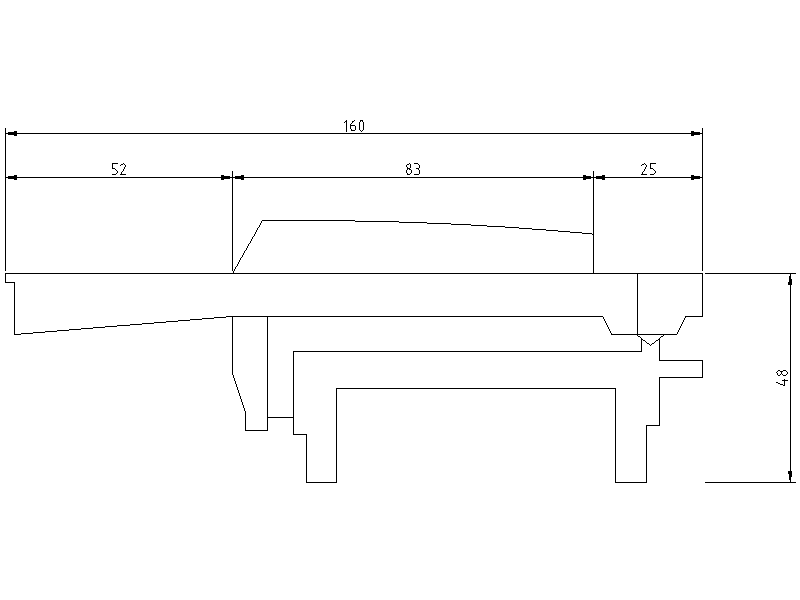
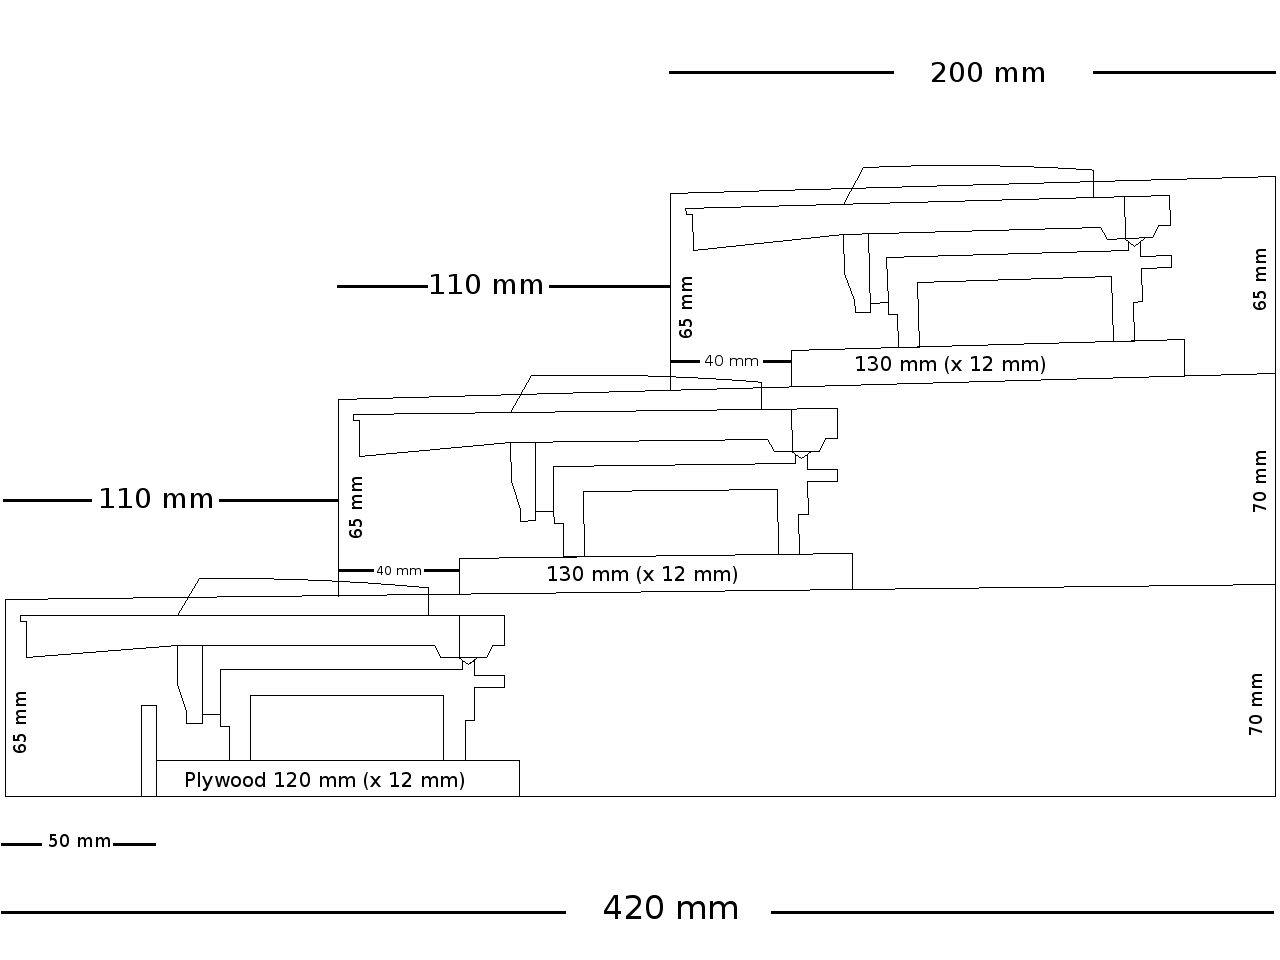
With the interior removed I carefully measured up the keyboard with it's stand and created drawings of it which I then combined into a drawing that showed the whole setup from the side. I went for a vertical distance of around 66 mm and the distance from one manuals keyfronts to the next is 110 mm. This makes it fairly close to the AGO recommendations and should be comfortable to play.
Here follows some images of my drawings. First is the keys and stand that the M-Audio keystation 61es has.
Combined into the setup that I planned the drawing looks like this.
The drawings are also available as .dxf files. For the keys with stand here, and for the whole setup here.
For the lowest keycheeks one needs two pieces 420 x 65 – 70 x 35. The middle and highest keycheeks I made slightly too long to begin with to be able to cut them straight later. The dimensions were 310+ x 65-70 x 35 for the middle and 200+ x 65 x 35 for the highest.
The opening for the keys should be 838 mm wide. Because I wanted to be able to screw the plywood sheets to the keycheeks I made them 20 mm too long on both sides. So the plywoood sheets were 878 x 120 (or 130) x 12.
The slots in the keycheeks were made after measuring (20 mm in and 12 mm high, 50 mm from front and 120 long in the lowest, 40 mm from front and 130 long in both upper) by first cutting the ends with a chisel. This was important! I first tried to only use the router for it but then the wood split and the keycheek was ruined. So, I cut the ends of the slots all the way to the bottom first with chisel by hand and then routed away the wood in between.
 The plywood sheets and the keycheeks were pre-drilled before screwing them together. The keycheeks have dowels in them to keep them together and a piece of plywood screwed on each side on the inside at the back to ensure that they stay close togheter.
On this picture one can clearly see the added length to the two upper manuals that I'm going to trim away later.
A word about materials. I've used pine for the keycheeks. I had some pieces of easy to get normal wood in 70 x 45 dimensions lying around at home that I could use after milling it down to desired dimensions. Also the construction grade plywood was readily available here so I used it. There are much nicer looking qualitys of wood and plywood to use but I decided to use what was at hands. Besides, the plywood won't be seen when the keys are in place after all. The setup is pretty rigid anyway so I don't expect any trouble because of it.
 I put a keyboard into the frame to check the fit and to mark where the holes in the plywood boards should be drilled to secure the keyboards to the frame. I also checked where I should make holes for the flat cable connector to go through the plywood. I intend to mount the PCBs under the keyboards, except for the first one that I'll have to find another solution for.
I think that I'll go for a mahogny brown alcohol based stain and a couple of layers of clear laquer, but that's for later. I must cut the thin strips of wood that will cover the front of the plywood first. A thicker piece of wood will be placed above the third manual, and I'll have to cut that also.
 I drilled all the holes for fastening the keyboards to the plywood boards with a 4 mm drill. I'll also countersink the holes from the underside so that the screws will reach better through the plywood and lay flush with the bottom.
The holes for the flat cable and power cable were made by drilling four holes with a 10 mm drill with only a short distance in between. After that I removed the material in between the holes with a fine saw and used a file to smoothen the surfaces.
With all the pieces cut out I smoothened all the wooden surfaces with fine sandpaper. Two times I wiped the wood with a lightly moistured rag to raise the fibres and sanded it down again in between so that the end surface will be smoother. Then I applied a coat of mahogny brown stain on all the parts that could be visible in the finished setup.
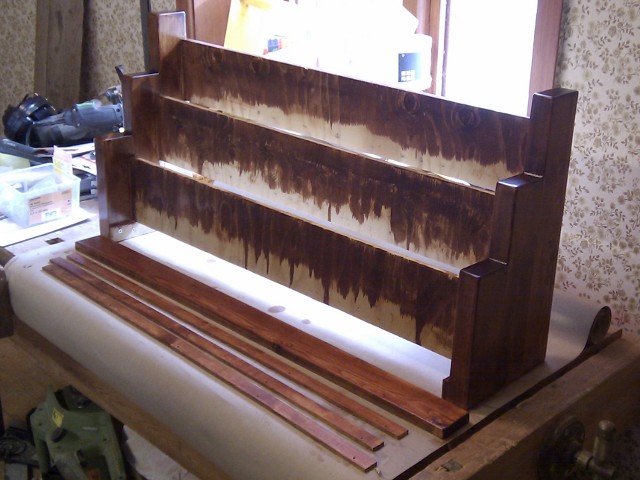 Four layers of clear laquer was then applied. It takes some patience to wait until the laquer is dry and hardened enough for the next layer to be applied. I did a very light sanding with fine sandpaper before applying the next layer to get a really smooth surface and for the laquer to stick better. I think it looks great! Of course the impression will be better when the keyboards are in place and all the pieces are put together.
So, then the small strips of wood between the manuals and the thick covering piece of wood on top needs to have felt padding to eliminate the gap in between the wood and the manual. It's not so nice to see the front part of the keys when they are depressed without felt. I used contact glue both on the wood and the felt and let it dry a little before I put them together.
The keyboards were mounted with the same screws that sat in the M-Audio case, quite deeply countersunk so that they would reach through the plywood. The lowest manuals PCB were mounted on a small separate plywood extension, and the upper ones were mounted under respective keyboard on the plywood with some distances. I only used the main PCB board and the small power input for every keyboard. They work just fine anyway.
Here are some pictures of the finished keyboard frame.
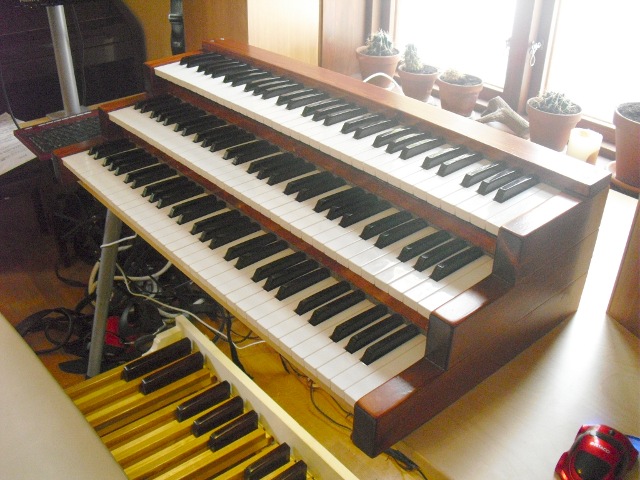
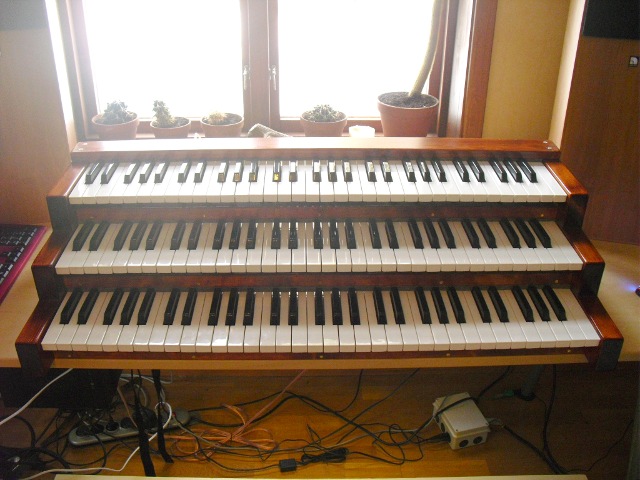
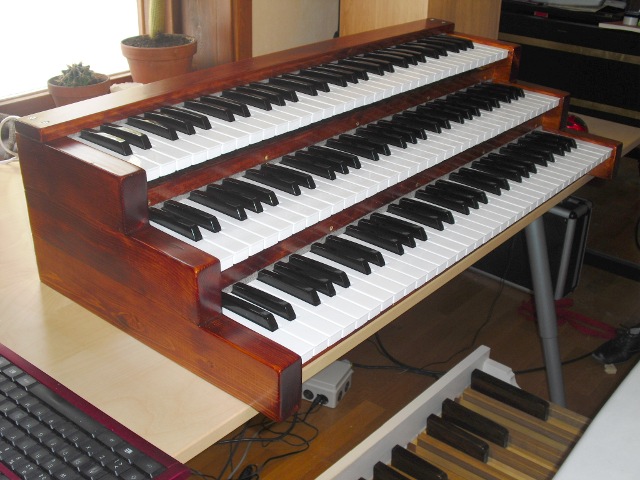
I should probably mention that I'm using the development version of GrandOrgue (0.3+) where it's easy to connect any MIDI keyboard to any organ manual/pedal by right clicking on the element, and also all available MIDI devices are listed even if they have the same name.
A new stand for the music is currently in production. This one will be solid as there were a little problem with light shining through if single pages were used. And finally, here's an image of the complete keyboard stack with stand.
